Hooks buttons or any other control into the Cesium Viewer toolbar.
Hello World!

If you want to use the BaseLayerPicker, then you need to specify what imagery and terrain seletions are available. It’s more code bu just as straight forward. Here’s a full example that adds two possible terrains and 2 possible imagery providers. It makes the second one active by default by setting the selectedXXX properties, otherwise the first index would be active instead.
var providerViewModels = [];
providerViewModels.push(new Cesium.ProviderViewModel({
    name : 'Bing Maps Aerial',
    iconUrl : Cesium.buildModuleUrl('Widgets/Images/ImageryProviders/bingAerial.png'),
    tooltip : 'Bing Maps aerial imagery \nhttp://www.bing.com/maps',
    creationFunction : function() {
        return new Cesium.BingMapsImageryProvider({
            url : '//dev.virtualearth.net',
            mapStyle : Cesium.BingMapsStyle.AERIAL
        });
    }
}));

providerViewModels.push(new Cesium.ProviderViewModel({
    name : 'Bing Maps Aerial with Labels',
    iconUrl : Cesium.buildModuleUrl('Widgets/Images/ImageryProviders/bingAerialLabels.png'),
    tooltip : 'Bing Maps aerial imagery with label overlays \nhttp://www.bing.com/maps',
    creationFunction : function() {
        return new Cesium.BingMapsImageryProvider({
            url : '//dev.virtualearth.net',
            mapStyle : Cesium.BingMapsStyle.AERIAL_WITH_LABELS
        });
    }
}));

var terrainViewModels = [];
terrainViewModels.push(new Cesium.ProviderViewModel({
    name : 'WGS84 Ellipsoid',
    iconUrl : Cesium.buildModuleUrl('Widgets/Images/TerrainProviders/Ellipsoid.png'),
    tooltip : 'WGS84 standard ellipsoid, also known as EPSG:4326',
    creationFunction : function() {
        return new Cesium.EllipsoidTerrainProvider();
    }
}));


terrainViewModels.push(new Cesium.ProviderViewModel({
    name : 'STK World Terrain meshes',
    iconUrl : Cesium.buildModuleUrl('Widgets/Images/TerrainProviders/STK.png'),
    tooltip : 'High-resolution, mesh-based terrain for the entire globe. Free for use on the Internet. Closed-network options are available.\nhttp://www.agi.com',
    creationFunction : function() {
        return new Cesium.CesiumTerrainProvider({
            url : '//assets.agi.com/stk-terrain/world',
            requestWaterMask : true,
            requestVertexNormals : true
        });
    }
}));

var viewer = new Cesium.Viewer('cesiumContainer', {
    imageryProviderViewModels : providerViewModels,
    selectedImageryProviderViewModel : providerViewModels[1],
    terrainProviderViewModels : terrainViewModels,
    selectedTerrainProviderViewModel : terrainViewModels[1]
});

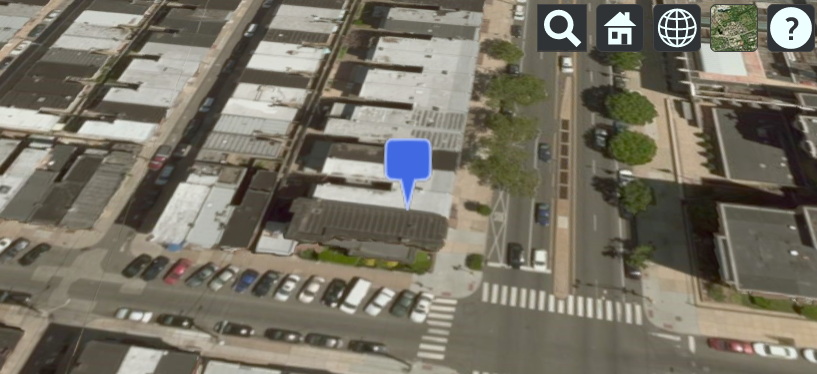
Flies to an entity (marker) then tracks it without the camera jumping
var viewer = new Cesium.Viewer('cesiumContainer', {timeline : false, animation : false});

var pinBuilder = new Cesium.PinBuilder();

var bluePin = viewer.entities.add({
    name : 'Blank blue pin',
    position : Cesium.Cartesian3.fromDegrees(-75.170726, 39.9208667),
    billboard : {
        image : pinBuilder.fromColor(Cesium.Color.ROYALBLUE, 48).toDataURL(),
        verticalOrigin : Cesium.VerticalOrigin.BOTTOM
    }
});


viewer.flyTo(bluePin).then(function(){
    viewer.trackedEntity = bluePin;
});

How to zoom in about 1000 meters above it ?
I would like to now get the position of the entity (used in the onTick), and then pass this to the camera, lookAt function.
entity.position() provides me info, but I am not sure how I can use this to pass it to the lookAt function.
var viewer = new Cesium.Viewer('cesiumContainer', {timeline : false, animation : false});

var pinBuilder = new Cesium.PinBuilder();

var bluePin = viewer.entities.add({

    position : Cesium.Cartesian3.fromDegrees(-75.170726, 39.9208667),
    billboard : {
        image : pinBuilder.fromColor(Cesium.Color.ROYALBLUE, 48).toDataURL(),
        verticalOrigin : Cesium.VerticalOrigin.BOTTOM
    }
});


viewer.scene.camera.lookAt(bluePin.position.getValue(viewer.clock.currentTime), new Cesium.Cartesian3(0,0,1000));
The first argument is the pin position. The second argument is a Cartesian3 offset in the pin’s reference frame, so z=1000 puts the camera 1000m above the pin.
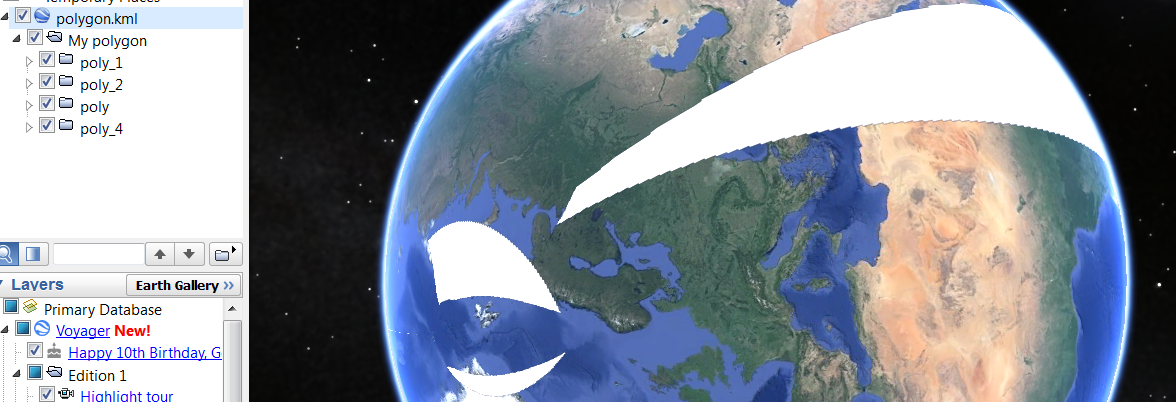
How to access from KML file and parse to make folder structure.

var viewer = new Cesium.Viewer('cesiumContainer', {
    timeline : true,
    animation : false,
    homeButton : false,
    screenModePicker : false,
    navigationHelpButton : false,
    baseLayerPicker : false,
    geocoder : false,
    sceneMode : Cesium.SceneMode.SCENE3D
});
var cesiumTerrainProviderMeshes = new Cesium.CesiumTerrainProvider({
    url : '//assets.agi.com/stk-terrain/world',
    requestWaterMask : true,
    requestVertexNormals : true
});
viewer.terrainProvider = cesiumTerrainProviderMeshes;
var ds = new Cesium.KmlDataSource();
var myDataSource;
ds.load('../../SampleData/polygon.kml').then(function(dataSource) {
    viewer.dataSources.add(dataSource);
    myDataSource = dataSource;
    //I gave an ID to folder containing each polygon then I took it by getById method
    var poly_1 = myDataSource.entities.getById('poly_1');
    var poly_2 = myDataSource.entities.getById('poly_2');
    var poly_3 = myDataSource.entities.getById('poly_3');
    var poly_4 = myDataSource.entities.getById('poly_4');

    Sandcastle.addToolbarButton('click1',function(){
        poly_1.show=false;
    });
    Sandcastle.addToolbarButton('click2',function(){
        poly_2.show=false;
    });
    Sandcastle.addToolbarButton('click3',function(){
        poly_3.show=false;
    });
    Sandcastle.addToolbarButton('click4',function(){
        poly_4.show=false;
    });
});
 var entities = dataSource.entities.values;
                console.log("entities_positions");
                for (var i = 0; i < entities.length; i++) {
                    entity =  entities[i];
                      var cartesianPositions = entity.polyline.positions;
                      var cartographicPositions = viewer.scene.globe.ellipsoid.cartesianArrayToCartographicArray(cartesianPositions._value);
                      var longitude = cartographicPositions[0].longitude;
                      var latitude = cartographicPositions[0].latitude;
                      var height = cartographicPositions[0].height;
                      console.log(longitude);
                      console.log(latitude);

                }
Those coordinates are given in radians. You can convert them back to degrees with Cesium.Math.toDegrees(radianValue).
How can i toggle multiple labels/entities ?
var viewer = new Cesium.Viewer('cesiumContainer', { infoBox : false });
var entities = viewer.entities;

var labels = entities.add(new Cesium.Entity());

var longitude = - 106;
for (var i = 0; i < 5; ++i) {
    entities.add({
        parent : labels,
        position : Cesium.Cartesian3.fromDegrees(longitude, 45.0),
        label : {
            text : i.toString()
        }
    });
    longitude++;
}

viewer.zoomTo(viewer.entities);

Sandcastle.addToolbarButton('Toggle Labels', function(){
    labels.show = !labels.show;
});
How does segmenting a polyline into different colors work.
var viewer = new Cesium.Viewer('cesiumContainer');

var primitive = new Cesium.Primitive({
  geometryInstances : new Cesium.GeometryInstance({
    geometry : new Cesium.PolylineGeometry({
      positions : [
        Cesium.Cartesian3.fromElements(-2822918.76, -1347627.64, 5539750.33),
        Cesium.Cartesian3.fromElements(-2860091, -1790883.7, 6104936.09),
        Cesium.Cartesian3.fromElements(-2869994.31, -2212991.67, 6598178.01)
      ],
      width : 2.0,
      vertexFormat : Cesium.PolylineColorAppearance.VERTEX_FORMAT,
      colors: [Cesium.Color.RED, Cesium.Color.BLUE],
      colorsPerVertex: false
    })
  }),
  appearance : new Cesium.PolylineColorAppearance({
    translucent : false
  })
});

viewer.scene.primitives.add(primitive);
I was working on parsing KML data file from different resources which had different urls and Cesiumjs was unable to read/parse, that is how i come to know enabling cross-origin resource sharing.
It is also called CORS. Here is more details .
Following these steps you can enable “CORS”.
1. First check if you have apache module installed, using php.
2. Use command line to check if you have “Access-Control-Allow-Origin: *”
Command is - curl -I http://yourwebsite.com
3. If you don’t see this line “Access-Control-Allow-Origin: *” in curl -I output you need to add and enable it in either in PHP file ot .htacces file.
HTTP/1.1 302 Found
Date: Sat, 19 Sep 2015 00:31:41 GMT
Server: Apache
Access-Control-Allow-Origin: *
Set-Cookie: PHPSESSID=k1ejs4ra2gsu2id387h472one2; path=/
Expires: Thu, 19 Nov 1981 08:52:00 GMT
Cache-Control: no-store, no-cache, must-revalidate, post-check=0, pre-check=0
Pragma: no-cache
Location: https://phpmind.com/index.php
Content-Type: text/html; charset=UTF-8
Set-Cookie: BIGipServer~DART-Dev~DART=1241032896.20480.0000; path=/
4. Now its time to add code and enable your missing part!
In .htaccess
Header set Access-Control-Allow-Origin "*"
In PHP file
header("Access-Control-Allow-Origin: *"); // for all

header('Access-Control-Allow-Origin: http://www.rnai.technology'); // For particular URL
header('Access-Control-Allow-Origin: http://phpmind.com');
header('Access-Control-Allow-Origin: http://maps.google.com');
After that you need to test using
Command is - curl -I http://yourwebsite.com
You must see Access-Control-Allow-Origin: *” with headers.
If you don’t have command line access use this code to see which apache modules are installed.
This will show a list like that.
By the way this not my server 🙂
Array
(
[0] => core
[1] => prefork
[2] => http_core
[3] => mod_so
[4] => mod_auth_basic
[5] => mod_auth_digest
[6] => mod_authn_file
[7] => mod_authn_alias
[8] => mod_authn_anon
[9] => mod_authn_dbm
[10] => mod_authn_default
[11] => mod_authz_host
[12] => mod_authz_user
[13] => mod_authz_owner
[14] => mod_authz_groupfile
[15] => mod_authz_dbm
[16] => mod_authz_default
[17] => util_ldap
[18] => mod_authnz_ldap
[19] => mod_include
[20] => mod_log_config
[21] => mod_logio
[22] => mod_env
[23] => mod_ext_filter
[24] => mod_mime_magic
[25] => mod_expires
[26] => mod_deflate
[27] => mod_headers
[28] => mod_usertrack
[29] => mod_setenvif
[30] => mod_mime
[31] => mod_dav
[32] => mod_status
[33] => mod_autoindex
[34] => mod_info
[35] => mod_dav_fs
[36] => mod_vhost_alias
[37] => mod_negotiation
[38] => mod_dir
[39] => mod_actions
[40] => mod_speling
[41] => mod_userdir
[42] => mod_alias
[43] => mod_substitute
[44] => mod_rewrite
[45] => mod_proxy
[46] => mod_proxy_balancer
[47] => mod_proxy_ftp
[48] => mod_proxy_http
[49] => mod_proxy_ajp
[50] => mod_proxy_connect
[51] => mod_cache
[52] => mod_suexec
[53] => mod_disk_cache
About MapReduce
MapReduce is the heart of Hadoop®. It is this programming paradigm that allows for massive scalability across hundreds or thousands of servers in a Hadoop cluster. The MapReduce concept is fairly simple to understand for those who are familiar with clustered scale-out data processing solutions.
For people new to this topic, it can be somewhat difficult to grasp, because it’s not typically something people have been exposed to previously. If you’re new to Hadoop’s MapReduce jobs, don’t worry: we’re going to describe it in a way that gets you up to speed quickly.
The term MapReduce actually refers to two separate and distinct tasks that Hadoop programs perform. The first is the map job, which takes a set of data and converts it into another set of data, where individual elements are broken down into tuples (key/value pairs). The reduce job takes the output from a map as input and combines those data tuples into a smaller set of tuples. As the sequence of the name MapReduce implies, the reduce job is always performed after the map job.
An example of MapReduce
Let’s look at a simple example. Assume you have five files, and each file contains two columns (a key and a value in Hadoop terms) that represent a city and the corresponding temperature recorded in that city for the various measurement days. Of course we’ve made this example very simple so it’s easy to follow. You can imagine that a real application won’t be quite so simple, as it’s likely to contain millions or even billions of rows, and they might not be neatly formatted rows at all; in fact, no matter how big or small the amount of data you need to analyze, the key principles we’re covering here remain the same. Either way, in this example, city is the key and temperature is the value.
Toronto, 20
Whitby, 25
New York, 22
Rome, 32
Toronto, 4
Rome, 33
New York, 18
Out of all the data we have collected, we want to find the maximum temperature for each city across all of the data files (note that each file might have the same city represented multiple times). Using the MapReduce framework, we can break this down into five map tasks, where each mapper works on one of the five files and the mapper task goes through the data and returns the maximum temperature for each city. For example, the results produced from one mapper task for the data above would look like this:
(Toronto, 20) (Whitby, 25) (New York, 22) (Rome, 33)
Let’s assume the other four mapper tasks (working on the other four files not shown here) produced the following intermediate results:
(Toronto, 18) (Whitby, 27) (New York, 32) (Rome, 37)(Toronto, 32) (Whitby, 20) (New York, 33) (Rome, 38)(Toronto, 22) (Whitby, 19) (New York, 20) (Rome, 31)(Toronto, 31) (Whitby, 22) (New York, 19) (Rome, 30)
All five of these output streams would be fed into the reduce tasks, which combine the input results and output a single value for each city, producing a final result set as follows:
(Toronto, 32) (Whitby, 27) (New York, 33) (Rome, 38)
As an analogy, you can think of map and reduce tasks as the way a census was conducted in Roman times, where the census bureau would dispatch its people to each city in the empire. Each census taker in each city would be tasked to count the number of people in that city and then return their results to the capital city. There, the results from each city would be reduced to a single count (sum of all cities) to determine the overall population of the empire. This mapping of people to cities, in parallel, and then combining the results (reducing) is much more efficient than sending a single person to count every person in the empire in a serial fashion.