Understanding delete operator in Javascript

Delete operator is used to delete the property of an object. It completely remove the property and keep the rest of the object intact.

  • The delete operator will not delete ordinary variables.
  • It cannot delete properties of the global object, which were declared with the var keyword.
  • However, it will delete “global variables,” which were not declared with var keyword. since they are actually properties of the global object ( window in the browser).
  • The delete operator doesn’t delete prototype property.

For examples:

var person = { rank : 1};
var result = (function(){
    delete person.rank;
    return person.rank;
  })();
  console.log(result); // undefined

The result would be undefined. In the above code, we have an object named as “person” which has the property “rank”, and as it is a self-invoking function, we will delete the “rank” property from object “person”. When we console.log the reference of the property the result will be undefined.

Let us go through some examples where delete operator doesn’t work:

var result = (function(number){
    delete number;
    return number;
  })(5);  
  console.log(result); // 5

The result would be 5. Delete operators don’t affect local variables. Here, “number” is not an object but a local variable. The delete operator will not delete ordinary variables.

 var number = 5;
var result = (function(){
    delete number;
    return number;
  })();
  console.log(result); // 5

The result would be 5. Delete operators don’t affect global variables declared with var keyword. Here, “number” is not an object but a global variable of type number.

 number = 5; // var is not used. hence it is a property of window.
delete window.number;
console.log(number); // ReferenceError: number is not defined

The result would be “number is not defined”. Here, the global variable “number” is not defined with var keyword. hence, the delete operator will delete “number” since they are actually properties of the global object (window in the browser).

var team = {
  name: 'Jane'
};
var team2 = Object.create(team);
delete team2.name;
console.log(team2.name); // Jane

The result would be “Jane”. Delete operator will not affect prototype property. Here, “name” is a prototype property of team2.

Share

How Alexa’s intents, utterances and slots works together ?


To create a Alexa skill, you will first define the intents. For each intent you will add utterances and slots. Utterances are phrases that invoke the intent. Slots are input data required to fulfill the intent. Lastly, you will provide the business logic necessary to execute the action.

Q. What is an Intent?

To build an Amazon skill you will identify a set of goals or ‘intents’ you want your skill to achieve.
A skill can have multiple intents. For example, a ‘BookTickets’ bot can have intents to make reservations, cancel reservations and review
reservations.

Q. What is an utterance?

An ‘utterance’ is the spoken or typed phrase to invoke an intent. For example, to invoke intent to make reservations you would define an utterance such as “Can I make a reservation?”

Q. What are slots?

To fulfill an intent, the Amazon skill needs information from the user. This information is captured in ‘slots’. For example, you would define show name and time as slots for intent to make reservations.

Share

Chat Bot comparison luis.ai vs api.ai vs wit.ai.

╔══════════════════════════════════════════════════════════════════════════════════════════════════════════════════════════════╗
║                                                  wit.ai vs api.ai vs luis.ai                                                 ║
╠══════╦════════════════════════════════════╦═════════════════════════════════════════════╦════════════════════════════════════╣
║ S.No ║               Wit.ai               ║                    Api.ai                   ║               Luis.ai              ║
╠══════╬════════════════════════════════════╬═════════════════════════════════════════════╬════════════════════════════════════╣
║ 1    ║ Wit.ai API is completely free      ║ Api.ai Has a paid enterprise option         ║ LUIS is in beta and free to use    ║
║      ║ with no limitations on             ║ which allows for this to be run on a        ║ 10K transactions per month         ║
║      ║ request rates.                     ║ private cloud internally and more           ║ and up to 5 requests per second    ║
║      ║                                    ║ from their services team.,Basic paid        ║ for each account.                  ║
║      ║                                    ║ version starts at 89USD per month.          ║                                    ║
║      ║                                    ║ Free account has no transaction limit       ║                                    ║
║      ║                                    ║ for month anymore.                          ║                                    ║
╠══════╬════════════════════════════════════╬═════════════════════════════════════════════╬════════════════════════════════════╣
║ 2    ║ Provides a nice combination        ║ Speech to Text and Text to Speech           ║ LUIS uses machine learning         ║
║      ║ of both voice recognition and      ║ capabilities, along with machine            ║ based methods to analyze           ║
║      ║ machine learning for developers.   ║ learning.                                   ║ sentences. To perform machine      ║
║      ║                                    ║                                             ║ learning, LUIS breaks an           ║
║      ║                                    ║                                             ║ utterance into "tokens".           ║
╠══════╬════════════════════════════════════╬═════════════════════════════════════════════╬════════════════════════════════════╣
║ 3    ║ Has two main elements to it        ║ Support of Intents, Entities, actions       ║ Supports Intents, Entities         ║
║      ║ that you set up within your        ║ and one key focus area is its “Domains”.    ║ and actions.                       ║
║      ║ app – intents and entities.        ║                                             ║                                    ║
║      ║ Actions are separated to           ║                                             ║                                    ║
║      ║ use as a combined operations.      ║                                             ║                                    ║
╠══════╬════════════════════════════════════╬═════════════════════════════════════════════╬════════════════════════════════════╣
║ 4    ║ Has pre-build entities like        ║ Has pre-build entities like @sys.date,      ║ Has pre-build entities             ║
║      ║ temperature, number, URLs,         ║ @sys.color, @sys.unit-currency… etc.        ║ builtin.intent.alarm,              ║
║      ║ emails, duration… etc.             ║                                             ║ builtin.intent.calendar,           ║
║      ║                                    ║                                             ║ builtin.intent.email… etc.         ║
╠══════╬════════════════════════════════════╬═════════════════════════════════════════════╬════════════════════════════════════╣
║ 5    ║ Doesn’t have integration module    ║ Has integration module to connect           ║ Has integration to Microsoft       ║
║      ║ to directly communicating with     ║ directly to Facebook messenger and          ║ Azure and other services, can be   ║
║      ║ Facebook messenger or other        ║ other messenger api’s. Has support for      ║ deployable in any supported        ║
║      ║ messenger APIs. but has web        ║ deploying in to heroku server, enterprise   ║ servers.                           ║
║      ║ service api to hook services.      ║ paid environment.                           ║                                    ║
╠══════╬════════════════════════════════════╬═════════════════════════════════════════════╬════════════════════════════════════╣
║ 6    ║ Early in 2015, joined Facebook     ║ Created by a team who built personal        ║ LUIS was introduced together with  ║
║      ║ and opened up the entire platform  ║ assistant app for major mobile platforms    ║ Microsoft Bot Framework and Skype  ║
║      ║ to be free for both public and     ║ with speech and text enabled conversations. ║ Developer Platform which can be    ║
║      ║ private instances.                 ║ acquired by google (sept 2016).             ║ used to create Skype Bots.         ║
╠══════╬════════════════════════════════════╬═════════════════════════════════════════════╬════════════════════════════════════╣
║ 7    ║ Wit.ai API for developers of iOS,  ║ Api.ai has SDKs for Android, iOS,           ║ LUIS allow building applications   ║
║      ║ Android, Node.js, Raspberry Pi,    ║ the Apple Watch, Node.js, Cordova,          ║ by using the LUIS web interface.   ║
║      ║ Ruby, Python, C, Rust and          ║ Unity, C#, Xamarin, Windows Phone,          ║ No coding needed other than the    ║
║      ║ Windows Phone. It even             ║ Python and JavaScript. It also can be       ║ ability to interpret and use the   ║
║      ║ has a JavaScript plugin for        ║ integrated with Amazon’s Echo and           ║ returned JSON in application.      ║
║      ║ front end developers.              ║ Microsoft’s Cortana.                        ║ It is also possible to use the     ║
║      ║                                    ║                                             ║ LUIS REST API for                  ║
║      ║                                    ║                                             ║ automation of applications.        ║
╚══════╩════════════════════════════════════╩═════════════════════════════════════════════╩════════════════════════════════════╝

Amazon Lex is a service for building conversational interfaces into any application using voice and text. Lex provides the advanced deep learning functionalities of automatic speech recognition (ASR) for converting speech to text, and natural language understanding (NLU) to recognize the intent of the text, to enable you to build applications with highly engaging user experiences and lifelike conversational interactions. With Amazon Lex, the same deep learning technologies that power Amazon Alexa are now available to any developer, enabling you to quickly and easily build sophisticated, natural language, conversational bots (“chatbots”).

https://aws.amazon.com/lex/

Share

Cesium – How to show pyramid with polygon base in CZML ?


    var czml = [
      {
        "id" : "document",
        "name" : "CZML Geometries: Polygon",
        "version" : "1.0"
      }, {
        "id" : "orangePolygon",
        "name" : "Orange polygon with per-position heights and outline",
        "polygon" : {
          "positions" : {
            "cartographicDegrees" : [
              -70.0, 35.0, 100000,
              -72.0, 37.0, 0,
              -68.0, 35.0, 0
            ]
          },
          "material" : {
            "solidColor" : {
              "color" : {
                "rgba" : [255, 100, 0, 100]
              }
            }
          },
      "extrudedHeight" : 0,
      "perPositionHeight" : true,
      "outline" : true,
      "outlineColor" : {
        "rgba" : [0, 0, 0, 255]
      }
    }
  },


    {
    "id" : "orangePolygon2",
    "name" : "Orange polygon with per-position heights and outline",
    "polygon" : {
      "positions" : {
        "cartographicDegrees" : [
          -70.0, 35.0, 100000,
          -70.0, 33.0, 0,
          -68.0, 35.0, 0
        ]
      },
      "material" : {
        "solidColor" : {
          "color" : {
            "rgba" : [255, 100, 0, 100]
          }
        }
      },
      "extrudedHeight" : 0,
      "perPositionHeight" : true,
      "outline" : true,
      "outlineColor" : {
        "rgba" : [0, 0, 0, 255]
      }
    }
  },

    {
    "id" : "orangePolygon3",
    "name" : "Orange polygon with per-position heights and outline",
    "polygon" : {
      "positions" : {
        "cartographicDegrees" : [
          -70.0, 35.0, 100000,
          -70.0, 33.0, 0,
          -72.0, 37.0, 0,
        ]
      },
      "material" : {
        "solidColor" : {
          "color" : {
            "rgba" : [255, 100, 0, 100]
          }
        }
      },
      "extrudedHeight" : 0,
      "perPositionHeight" : true,
      "outline" : true,
      "outlineColor" : {
        "rgba" : [0, 0, 0, 255]
      }
    }
  }
];

var viewer = new Cesium.Viewer('cesiumContainer');
var dataSource = Cesium.CzmlDataSource.load(czml);
viewer.dataSources.add(dataSource);
viewer.zoomTo(dataSource);

Share

Cesium – How to show multiple polylines using czml ?

var czml = [
  {
    "id" : "document",
    "name" : "CZML Geometries: Polyline",
    "version" : "1.0"
  },
  {
    "id" : "redLine",
    "name" : "Red line on the surface",
    "polyline" : {
      "show": false,
      "positions" : {
        "cartographicDegrees" : [
          -75, 35, 0,
          -125, 35, 0
        ]
      },
      "material" : {
          "polylineOutline": {
              "color": {"rgba": [255, 0, 0, 255]},
              "outlineColor": {"rgba": [255, 255, 255, 255]},
              "outlineWidth": 2.0
          }
      },
      "width" : 5
    }
  },
  {
    "id" : "purpleLine",
    "name" : "Purple straight line at height",
    "polyline" : {
      "show": false,
      "positions" : {
        "cartographicDegrees" : [
          -125, 35, 0,
          -170, 35, 0
        ]
      },
      "material" : {
          "polylineOutline": {
              "color": {"rgba": [148, 0, 211, 255]},
              "outlineColor": {"rgba": [255, 255, 255, 255]},
              "outlineWidth": 2.0
          }
      },
      "width" : 5
    }
  }
];

var viewer = new Cesium.Viewer('cesiumContainer');
var dataSource = new Cesium.CzmlDataSource();
dataSource.load(czml);
viewer.dataSources.add(dataSource);
viewer.zoomTo(dataSource);

var handler = new Cesium.ScreenSpaceEventHandler(viewer.scene.canvas);
handler.setInputAction(
    function () { 
        dataSource.entities.getById('purpleLine').polyline.show = true;
        dataSource.entities.getById('redLine').polyline.show = true;

    },
    Cesium.ScreenSpaceEventType.LEFT_CLICK
);

By : https://github.com/AnalyticalGraphicsInc/cesium/issues/3598

Share

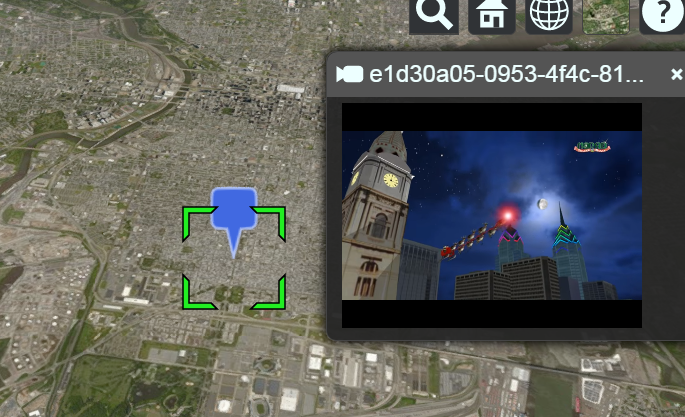
Cesium – How to make an InfoBox pop up on demand ?

                              .....
                           .'       '.
                          .           .
                          :           :
                          '           '
                ,.*====.   '.       .'   .====*.,
               .-`"/c)}}},    :...:    ,{{{(c\"`-.
           _.-'-6>   {{{{{'''`     `'''}}}}}   <9-'-._
          t         |}}}}}}           {{{{{{|         y
           \__.___.'{{{{{{{           }}}}}}}'.___.__/
               `[__/}}}}}}}}         {{{{{{{{\__]`
                {{{.'     `'-._   _.-'`     '.}}}
                }}/            ```            \{{
                {{|                           |}}
                }}|                           |{{
         .------{{{\    ,               ,    /}}}------.
        //.--------'    ;               ;   '---------.\\
       ((///  _          \             /          _  \\\))
 jgs    (((--' `''-------'`'"'-----'"'`'-------''` '--)))

It’s a bit of a hack, but you can make the info popup display whatever you like by creating a fake entity and setting it as the viewer’s selected entity. For example:

var entity = new Cesium.Entity('Title to put in the infobox');
entity.description = {
    getValue : function() {
        return 'HTML to display in the infobox';
    }
};
viewer.selectedEntity = entity;
Share

Cesium – How to Improve InfoBox ?

In order to run a script in the infobox, you have to enable scrips to run in the iframe. This is disabled by default for security reasons, in case you don’t know the source of the data populating the infobox.
You can enable scrips with this code:

var iframe = document.getElementsByClassName('cesium-infoBox-iframe')[0];
iframe.setAttribute('sandbox', 'allow-same-origin allow-scripts allow-popups allow-forms'); 

Also, to get the current value of an entity property, you can use .getValue(viewer.clock.currentTime);

Share

Cesium – How to show tooltip in cesium ?


Share

How do I find ElasticSearch path to install plugins?

This is for new ElasticSearch user.

If you have installed elastic search and unable to install plugins, here are the easy steps.

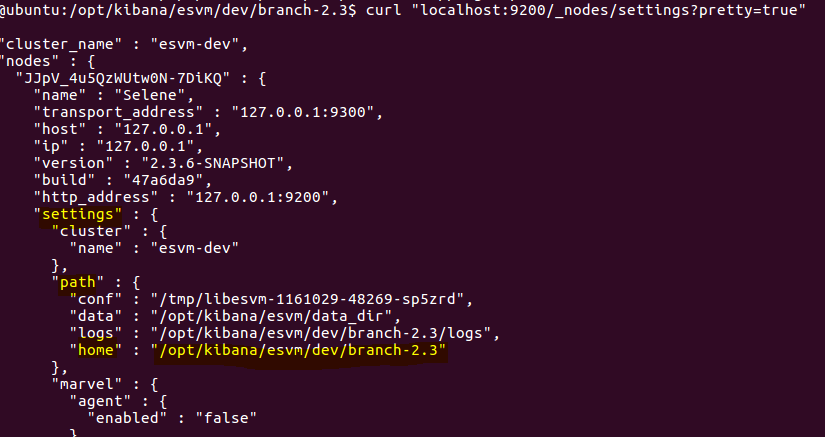
1. Type this command

$ curl "localhost:9200/_nodes/settings?pretty=true"

elasticsearch-plugin

Locate your home directory ( Look for Settings -> Path -> Home for value )
2. Go to Location (Example on the picture above)

 cd /opt/kibana/esvm/dev/branch-2.3" 

Install Plugin (Example plugin: mobz/elasticsearch-head)

 sudo bin/plugin install mobz/elasticsearch-head

If you are using old elasticSearch use "-install" instead of just install

I have ES 2.1.0 and the command is : sudo bin/plugin install mobz/elasticsearch-head  for me

How to test –

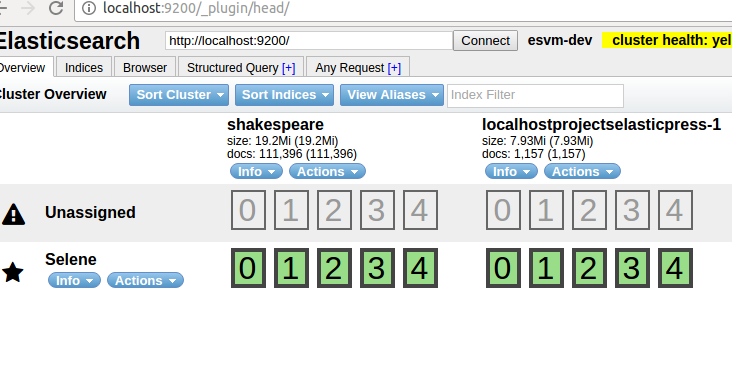
Open this URL

http://localhost:9200/_plugin/head/

If you see this, your plugin is working.
phpmind-elasticsearch-head-plugin

similarly, you can install other plugins –

sudo bin/plugin install https://github.com/AIsaac08/bigdesk/archive/master.zip

Command which is given in the site is not working on 29th of Nov 2015 


About BigDesk Plugin phpmind-elasticsearch-bigdesk-plugin

How to test – http://localhost:9200/_plugin/bigdesk/

phpmind-elasticsearch-bigdesk-plugin-test

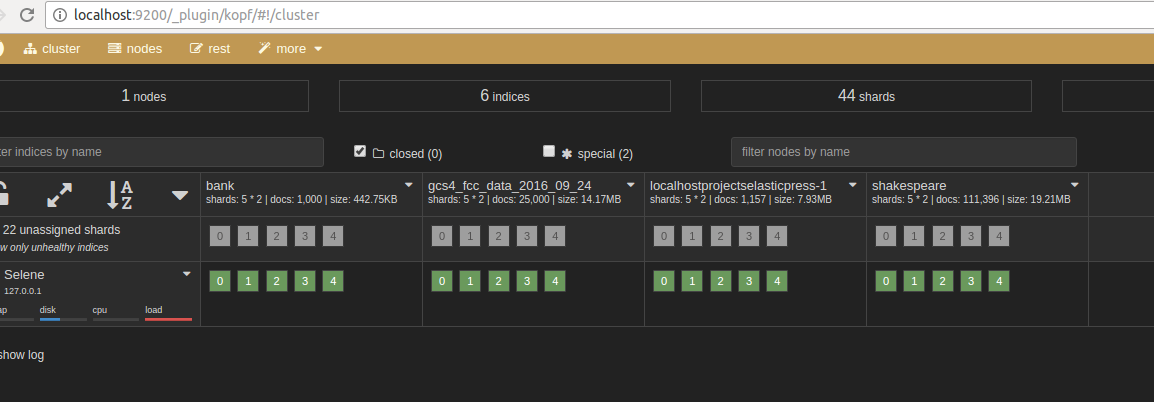
kopf is a simple web administration tool for elasticsearch written in JavaScript + AngularJS + jQuery + Twitter bootstrap

How to install –

<pre>sudo bin/plugin install https://github.com/lukas-vlcek/bigdesk/archive/master.zip</pre>

phpmind-elasticsearch-kopf-plugin


How to test –  http://localhost:9200/_plugin/kopf

phpmind-elasticsearch-kopf-plugin-test

About  koph 

Share