Category Archives: JavaScript

Synchronous and Asynchronous

JavaScript itself is synchronous and single-threaded language. but you can write code in such a manner that function execution take a long time and can be interleaved with other operations.

First, let us use an analogy to understand Synchronous and Asynchronous.

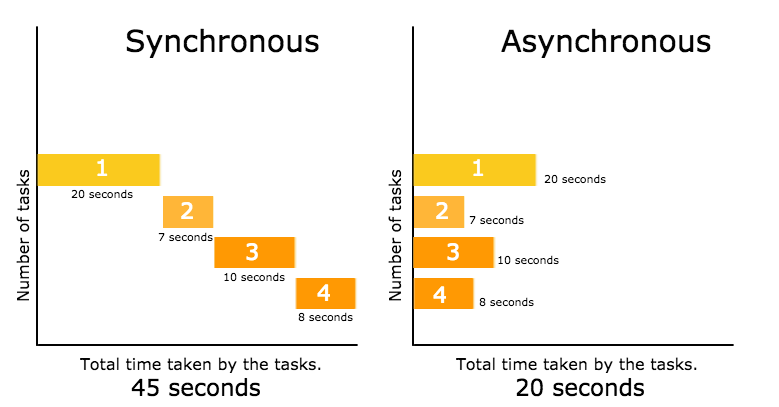
Synchronous – You are in a Bus stop. When bus arrived, people will enter in a bus one by one. You cannot get into the bus until everybody in front of you gets in. and the same concept applies to the people standing behind you. This is Synchronous.

Executing something synchronously means, you wait for the task to finish before moving on to another task. Or we can say, two synchronous threads must be aware of one another, and one must execute in some way that is dependent on the other.

Asynchronous – Take household chores as an example. You put clothes to get washed and dry in a washer and dryer. Then you bake pizza in a oven. Meanwhile you are cutting veggies for salad. In this situation, couple of tasks are getting done at the same time. When the task is done. It will simply report back. This is asynchronous.

Executing something asynchronously means, you can move on to another task without waiting for the first task to get finished. The result of each task will be handled once the result is available. Or in other words, Asynchronous means two threads are totally independent, run parallely and neither one comes in each other way at the time of execution.

Try this code

// synchronous
console.log('First Task');
console.log('Second Task');
console.log('Third Task');

Output will be :-

First Task
Second Task
Third Task

The output will be First Task, Second Task, Third Task. As javascript execute one function at a time and will wait for the function to be done before moving to the “Second Task”

Now try this code. I am using setTimeOut method here. The function will be processed in the background, while your program is doing other things.

// asynchronous
console.log('First Task');
setTimeout(function(){
   console.log('Second Task');
}, 2000); 

console.log('Third Task');

Output will be :-

First Task
Third Task
Second Task

The setTimeout() method calls a function or evaluates an expression after a specified number of milliseconds. The setTimeout() method is asynchronous as it breaks the synchronous flow. This trick is used to execute the code after stacked events and fix timing-related problems.

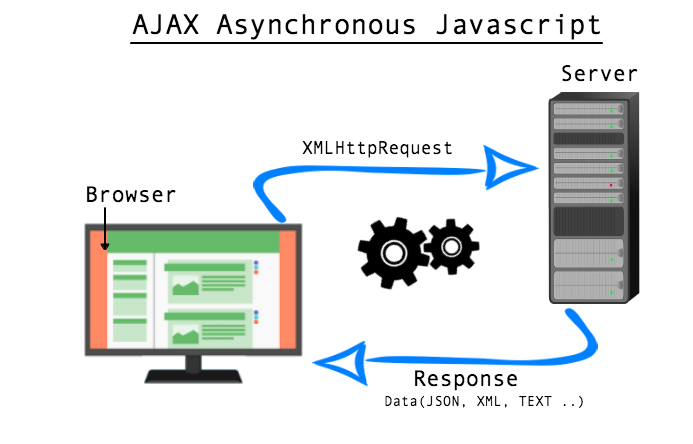
AJAX (Asynchronous JavaScript and XML) requests are by default asynchronous, The XMLHttpRequest object is used to exchange data with a server behind the scenes. When the browser makes server requests. The response could take a little time. So you set up a function that will wait for the response to be sent back by the server, and react to it once the response is available. This whole process does not comes in the way of other functions.

  var xhttp;
      if (window.XMLHttpRequest) {
        // code for modern browsers
        xhttp = new XMLHttpRequest();
      } else {
        // code for old browsers (IE6, IE5)
        xhttp = new ActiveXObject("Microsoft.XMLHTTP");
      }
      xhttp.onreadystatechange = function() {
        if (this.readyState == 4 && this.status == 200) {
          document.getElementById("ajax_demo").innerHTML = this.responseText;
        }
      };
      xhttp.open("GET", "fruits.txt", true);
      xhttp.send();
      xhttp.onload = function(){
        document.write(this.response);
      }; 
Share

Understanding Javascript Closure

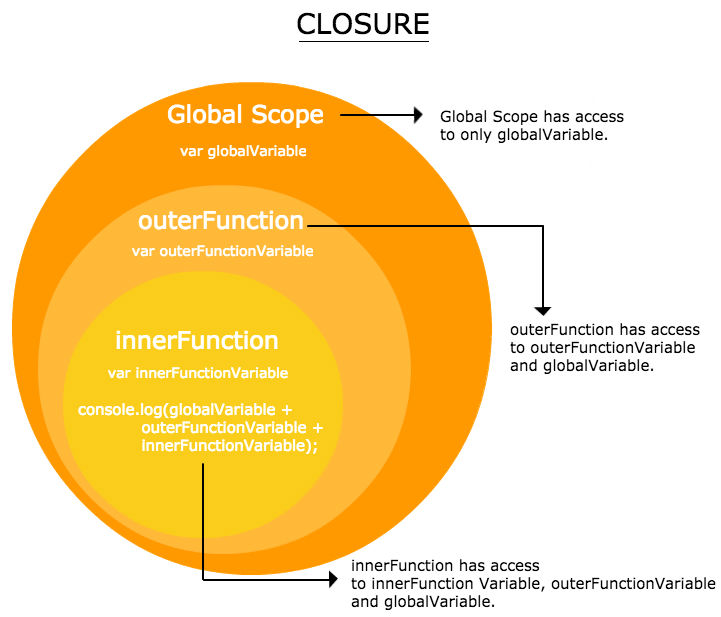
Closure is a nested function that has access to the variables in the outer (enclosing) function’s scope chain. It has access to variables in three scopes:

  • Variable in its own scope.
  • Variables in the enclosing (outer) function’s scope.
  • Global variables.

var globalVariable = 'Global variable.';

function outerFunction() {
  var outerFunctionVariable = 'Outer function variable.';
  
  function innerFunction () {
    var innerFunctionVariable = 'Inner function variable.';
    console.log("This is " + innerFunctionVariable);
    console.log("I can also access " + outerFunctionVariable);
    console.log("This is a " + globalVariable);
  };
  innerFunction();
};
outerFunction();

Best part of closure is that the nested (inner) function can access the variables from the outer scope even after the outer function has returned.

function myFunction(x) {
    var outerVariable = x;
    return function() {
        console.log(outerVariable);
    };
};

var secondFunction = myFunction("This is outer variable");
secondFunction();
Share

Understanding delete operator in Javascript

Delete operator is used to delete the property of an object. It completely remove the property and keep the rest of the object intact.

  • The delete operator will not delete ordinary variables.
  • It cannot delete properties of the global object, which were declared with the var keyword.
  • However, it will delete “global variables,” which were not declared with var keyword. since they are actually properties of the global object ( window in the browser).
  • The delete operator doesn’t delete prototype property.

For examples:

var person = { rank : 1};
var result = (function(){
    delete person.rank;
    return person.rank;
  })();
  console.log(result); // undefined

The result would be undefined. In the above code, we have an object named as “person” which has the property “rank”, and as it is a self-invoking function, we will delete the “rank” property from object “person”. When we console.log the reference of the property the result will be undefined.

Let us go through some examples where delete operator doesn’t work:

var result = (function(number){
    delete number;
    return number;
  })(5);  
  console.log(result); // 5

The result would be 5. Delete operators don’t affect local variables. Here, “number” is not an object but a local variable. The delete operator will not delete ordinary variables.

 var number = 5;
var result = (function(){
    delete number;
    return number;
  })();
  console.log(result); // 5

The result would be 5. Delete operators don’t affect global variables declared with var keyword. Here, “number” is not an object but a global variable of type number.

 number = 5; // var is not used. hence it is a property of window.
delete window.number;
console.log(number); // ReferenceError: number is not defined

The result would be “number is not defined”. Here, the global variable “number” is not defined with var keyword. hence, the delete operator will delete “number” since they are actually properties of the global object (window in the browser).

var team = {
  name: 'Jane'
};
var team2 = Object.create(team);
delete team2.name;
console.log(team2.name); // Jane

The result would be “Jane”. Delete operator will not affect prototype property. Here, “name” is a prototype property of team2.

Share

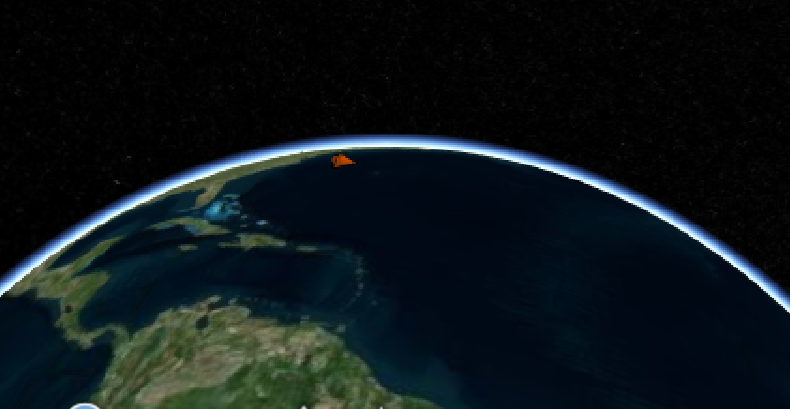
Cesium – How to show pyramid with polygon base in CZML ?


    var czml = [
      {
        "id" : "document",
        "name" : "CZML Geometries: Polygon",
        "version" : "1.0"
      }, {
        "id" : "orangePolygon",
        "name" : "Orange polygon with per-position heights and outline",
        "polygon" : {
          "positions" : {
            "cartographicDegrees" : [
              -70.0, 35.0, 100000,
              -72.0, 37.0, 0,
              -68.0, 35.0, 0
            ]
          },
          "material" : {
            "solidColor" : {
              "color" : {
                "rgba" : [255, 100, 0, 100]
              }
            }
          },
      "extrudedHeight" : 0,
      "perPositionHeight" : true,
      "outline" : true,
      "outlineColor" : {
        "rgba" : [0, 0, 0, 255]
      }
    }
  },


    {
    "id" : "orangePolygon2",
    "name" : "Orange polygon with per-position heights and outline",
    "polygon" : {
      "positions" : {
        "cartographicDegrees" : [
          -70.0, 35.0, 100000,
          -70.0, 33.0, 0,
          -68.0, 35.0, 0
        ]
      },
      "material" : {
        "solidColor" : {
          "color" : {
            "rgba" : [255, 100, 0, 100]
          }
        }
      },
      "extrudedHeight" : 0,
      "perPositionHeight" : true,
      "outline" : true,
      "outlineColor" : {
        "rgba" : [0, 0, 0, 255]
      }
    }
  },

    {
    "id" : "orangePolygon3",
    "name" : "Orange polygon with per-position heights and outline",
    "polygon" : {
      "positions" : {
        "cartographicDegrees" : [
          -70.0, 35.0, 100000,
          -70.0, 33.0, 0,
          -72.0, 37.0, 0,
        ]
      },
      "material" : {
        "solidColor" : {
          "color" : {
            "rgba" : [255, 100, 0, 100]
          }
        }
      },
      "extrudedHeight" : 0,
      "perPositionHeight" : true,
      "outline" : true,
      "outlineColor" : {
        "rgba" : [0, 0, 0, 255]
      }
    }
  }
];

var viewer = new Cesium.Viewer('cesiumContainer');
var dataSource = Cesium.CzmlDataSource.load(czml);
viewer.dataSources.add(dataSource);
viewer.zoomTo(dataSource);

Share

Cesium – How to show multiple polylines using czml ?

var czml = [
  {
    "id" : "document",
    "name" : "CZML Geometries: Polyline",
    "version" : "1.0"
  },
  {
    "id" : "redLine",
    "name" : "Red line on the surface",
    "polyline" : {
      "show": false,
      "positions" : {
        "cartographicDegrees" : [
          -75, 35, 0,
          -125, 35, 0
        ]
      },
      "material" : {
          "polylineOutline": {
              "color": {"rgba": [255, 0, 0, 255]},
              "outlineColor": {"rgba": [255, 255, 255, 255]},
              "outlineWidth": 2.0
          }
      },
      "width" : 5
    }
  },
  {
    "id" : "purpleLine",
    "name" : "Purple straight line at height",
    "polyline" : {
      "show": false,
      "positions" : {
        "cartographicDegrees" : [
          -125, 35, 0,
          -170, 35, 0
        ]
      },
      "material" : {
          "polylineOutline": {
              "color": {"rgba": [148, 0, 211, 255]},
              "outlineColor": {"rgba": [255, 255, 255, 255]},
              "outlineWidth": 2.0
          }
      },
      "width" : 5
    }
  }
];

var viewer = new Cesium.Viewer('cesiumContainer');
var dataSource = new Cesium.CzmlDataSource();
dataSource.load(czml);
viewer.dataSources.add(dataSource);
viewer.zoomTo(dataSource);

var handler = new Cesium.ScreenSpaceEventHandler(viewer.scene.canvas);
handler.setInputAction(
    function () { 
        dataSource.entities.getById('purpleLine').polyline.show = true;
        dataSource.entities.getById('redLine').polyline.show = true;

    },
    Cesium.ScreenSpaceEventType.LEFT_CLICK
);

By : https://github.com/AnalyticalGraphicsInc/cesium/issues/3598

Share

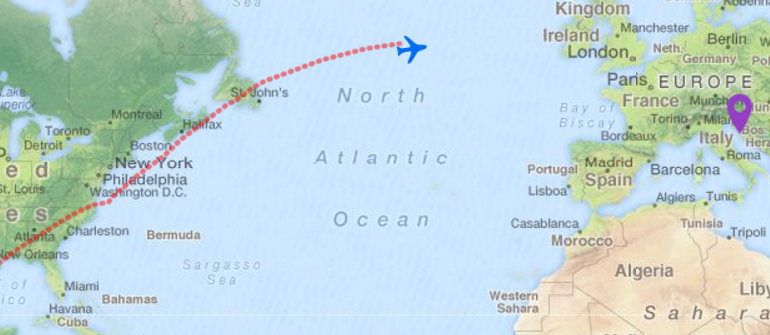
How to rotate flight marker towards arrival airport in leaflet ?


flight_market_heading

First it is important to know how it works –

    1. Check out Leaflet Rotated Marker  plugin https://github.com/bbecquet/Leaflet.RotatedMarker
    2. L.marker([48.8631169, 2.3708919], {
          rotationAngle: 45
      }).addTo(map);


rotationAngle property need a value and this is key. You will have to generate that dynamically based on aircraft position and destination airport.  Function below does the same calculate  and give rotationAngle.

Function in Python

def computeHeading(lat1, long1, lat2, long2):
    import math
    
    rlat1 = math.radians(lat1)
    rlat2 = math.radians(lat2)
       
    dlong = math.radians(long2 - long1)
    
    y = math.cos(rlat2) * math.sin(dlong)
    x = math.cos(rlat1) * math.sin(rlat2) - math.sin(rlat1) * math.cos(rlat2) * math.cos(dlong)
    heading = round(math.degrees(math.atan2(y, x)) + 360, 4) % 360
    
    return heading

Keep in mind that lat1 and long1 are the aircraft’s position. And lat2, long2 are airport destination where aircraft is heading.


Function in PHP

function computeHeading($lat1, $long1, $lat2, $long2) // lat1 and long1 are the aircraft's position
{

    $rlat1 = deg2rad($lat1);
    //$rlat2 = radians($lat2);

    //$rlat1 = radians($lat1);
    $rlat2 = deg2rad($lat2);

    $dlong = deg2rad($long2 - $long1);
    //$dlong = radians(long2 - long1);

    $y = cos($rlat2) * sin($dlong);
    $x = cos($rlat1) * sin($rlat2) - sin($rlat1) * cos($rlat2) * cos($dlong);
    $heading = round(degrees(atan2($y, $x)) + 360, 4) % 360;

    return $heading;

}

Function in JavaScript

  function computeHeading(lat1, long1, lat2, long2)
    {

        // Converts from degrees to radians.
        Math.radians = function(degrees) {
            return degrees * Math.PI / 180;
        };

        // Converts from radians to degrees.
        Math.degrees = function(radians) {
            return radians * 180 / Math.PI;
        };


       var rlat1 = Math.radians(lat1);
       var rlat2 = Math.radians(lat2);

       var dlong = Math.radians(long2 - long1);

       var y = Math.cos(rlat2) * Math.sin(dlong);
       var x = Math.cos(rlat1) * Math.sin(rlat2) - Math.sin(rlat1) * Math.cos(rlat2) * Math.cos(dlong);
       var heading = Math.round(Math.degrees(Math.atan2(y, x)) + 360, 4) % 360;

        return heading;

    }
Share

How to display two table columns per row using javascript ?


Share

How to Detecting Ad Blockers on Your Website using JavaScript ?

ad_blocker_phpmind
This code snippet will display a short message to the user on every page load if ad blockers in place.

It encourages readers to disable ad blocking from your site, which is as easy for them as a couple of clicks.

 
Share

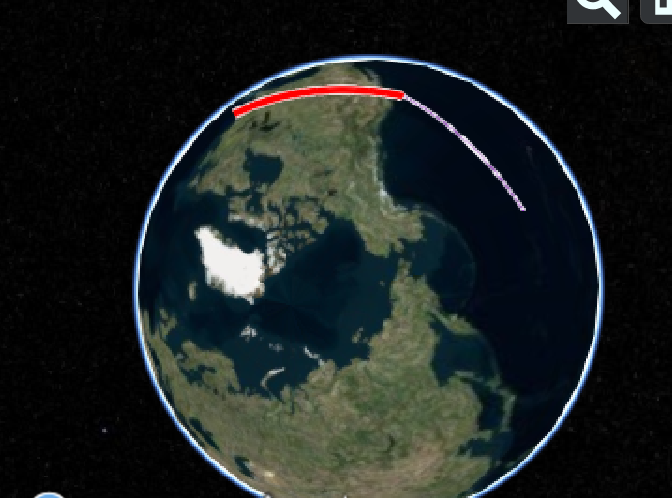
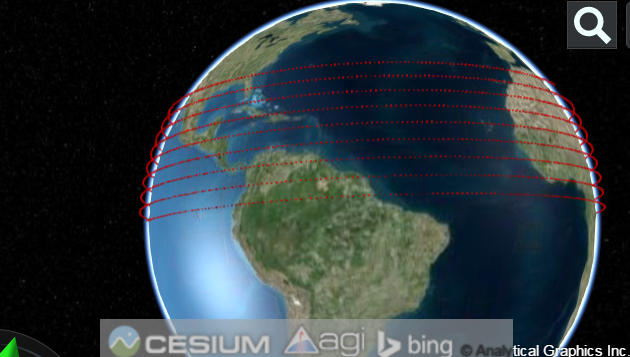
Cesiumjs – Draw line around the globe ?

Draw-line-around-the-globe


var viewer = new Cesium.Viewer('cesiumContainer');
var scene = viewer.scene;
var globe = scene.globe;
globe.depthTestAgainstTerrain = true;

var cesiumTerrainProviderHeightmaps = new Cesium.CesiumTerrainProvider({
    url : '//assets.agi.com/stk-terrain/world',
    requestWaterMask: true,
    requestVertexNormals: true
});

viewer.terrainProvider = cesiumTerrainProviderHeightmaps;

for(var iLp=0; iLp<3000; iLp++ ) {
    scene.primitives.add(new Cesium.Primitive({
        geometryInstances : new Cesium.GeometryInstance({
            geometry : Cesium.BoxGeometry.fromDimensions({
                vertexFormat : Cesium.PerInstanceColorAppearance.VERTEX_FORMAT,
                dimensions : new Cesium.Cartesian3(40000.0, 30000.0, 50000.0)
            }),
            modelMatrix : Cesium.Matrix4.multiplyByTranslation(
                Cesium.Transforms.eastNorthUpToFixedFrame(Cesium.Cartesian3.fromDegrees(-111.0+iLp, (iLp/100))),
                new Cesium.Cartesian3(0.0, 0.0, 250000), new Cesium.Matrix4()),
            attributes : {
                color : Cesium.ColorGeometryInstanceAttribute.fromColor(Cesium.Color.RED.withAlpha(0.5))
            }
        }),
        appearance : new Cesium.PerInstanceColorAppearance({
            closed: true
        })
    }));
}       

Share

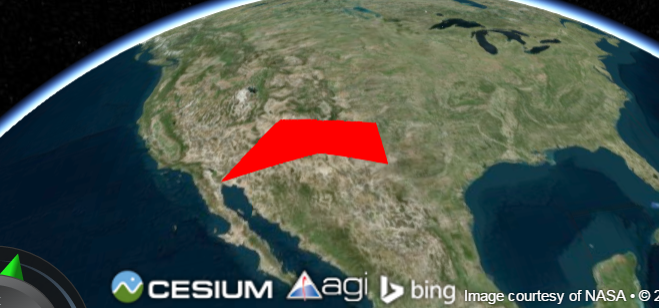
Cesium – How to changes the polygon positions on left click ?

changes-the-polygon-positions-on-left-click

var viewer = new Cesium.Viewer('cesiumContainer', {
    selectionIndicator : false,
    infoBox : false
});

var scene = viewer.scene;

var entity = viewer.entities.add({
    polygon : {
        hierarchy : Cesium.Cartesian3.fromDegreesArray([-115.0, 37.0,
                                                        -115.0, 32.0,
                                                        -107.0, 33.0,
                                                        -102.0, 31.0,
                                                        -102.0, 35.0]),
        material : Cesium.Color.RED
    }
}); 

var handler = new Cesium.ScreenSpaceEventHandler(scene.canvas);
handler.setInputAction(function(click) {
    var pickedObject = scene.pick(click.position);
    if (Cesium.defined(pickedObject) && (pickedObject.id === entity)) {
        var positions = entity.polygon.hierarchy.getValue(viewer.clock.currentTime);
        positions[0] = Cesium.Cartesian3.fromDegrees(-110.0, 37.0);
        entity.polygon.hierarchy = positions;
    }
}, Cesium.ScreenSpaceEventType.LEFT_CLICK);
Share